
48–72 hour property valuation tips for Kiwi sellers that raise value

Presentation and paperwork move a valuer’s report more than anything else you can control in the days before an inspection. Tidy kerb appeal, a clean kitchen and bathroom, and a folder of title documents, consents and renovation receipts give the valuer confidence in what they’re looking at. Fix or honestly disclose any serious defects rather than hiding them. A valuer can’t manufacture value that isn’t there, but poor presentation or missing paperwork can easily cost you what value already exists.
TL;DR:Presenting well-maintained kerb appeal, clean kitchens and bathrooms, and organized paperwork can significantly influence a valuer’s impression and final valuation.Gathering three to five recent comparable sales of similar nearby homes provides strong evidence to support your property’s value during the valuation process.Addressing minor repairs, decluttering, and quick cosmetic fixes like repainting and tidying the garden can boost the property’s perceived condition before inspection.Honest disclosure of unconsented work, deferred maintenance, or weatherproofing issues is crucial to avoid undervaluation and build trust with the valuer.Using a credible, neatly organized digital pack of all relevant documents ahead of the inspection helps streamline the process and reduces conservative assumptions in the report.
Table of Contents
- What do valuers look for during a property valuation?
- Your 48 to 72 hour valuation prep checklist
- What documents should you hand the valuer?
- Should you renovate before a valuation?
- How do you gather comparable sales evidence?
- What happens after the valuation inspection?
- A seller’s perspective: two quick wins and one hard call
- How do you communicate effectively with the valuer?
- Which valuation method will apply to your property?
- How can you address negative factors before the valuation?
- How do you read and use the valuation report afterwards?
- The gap between valuation advice and what actually works
- Get a fast, no-obligation cash offer instead of waiting on a valuation
- Sources
What do valuers look for during a property valuation?
A registered valuer weighs objective data against what they see on the day. Location, land size, building condition, layout, consent status and recent comparable sales all feed into the final figure, alongside broader market context like interest rate movements. The Reserve Bank’s August 2025 rate cut to 3.0% lowered borrowing costs, which tends to lift buyer demand and, with it, upward pressure on property values. That’s the kind of context a valuer factors in when weighing your local comps.
Trade Me Property’s summary of what valuers check breaks it down into the house itself, the land, the surrounding area and current market conditions.
A registered valuer’s report differs from a real estate agent’s appraisal. Under the Valuers Act, an independent registered valuer’s report lists improvements, ownership type, title and registered interests, backed by photographic evidence and stated assumptions. An agent’s appraisal is a sales opinion; a valuer’s report is a formal, defensible document, often used for lending, insurance or legal purposes.
- Location and land: zoning, section size, aspect
- Structure and condition: age, materials, maintenance state
- Layout and flow: bedroom and bathroom count, usable space
- Consents and compliance: any unconsented work stands out immediately
- Comparable sales: what similar homes nearby have actually sold for
Pro Tip: Free online estimates and council rating valuations are handy for a ballpark figure, but they can’t account for a new kitchen or a granny flat out back. Don’t lean on them as a substitute for what a registered valuer physically inspects.
Your 48 to 72 hour valuation prep checklist
You don’t need weeks to prepare. Most of what influences a valuer’s impression can be sorted in a couple of focused days.
- Sort the kerb appeal first. Mow the lawns, trim hedges, clear rubbish bins from view and tidy the entranceway. First impressions set the tone before the valuer even steps inside.
- Deep clean the hero rooms. Kitchens and bathrooms carry outsized weight in a valuer’s photos and in your own presentation. Wipe benches, clear clutter and make taps and tiles shine.
- Declutter to create flow. Pack away excess furniture and personal items so rooms read as bigger and more functional than they might feel with everyday life scattered through them.
- Handle quick repairs. Fix leaking taps, loose door handles, cracked tiles and anything else minor. If a problem is structural or involves consent issues, stop and disclose it rather than papering over it.
- Prep for photography and measurement. Open curtains, switch on lights in darker rooms and make sure every space the valuer needs to measure and photograph is accessible.
- Sort the logistics. Secure pets somewhere out of the way, unlock any locked cupboards or sheds, and leave clear parking for the valuer’s arrival.
Pro Tip: Do the kitchen and main bathroom last, right before the valuer arrives. These are the two rooms most likely to feature in the report’s photo set, so keep them camera ready until the doorbell rings.
What documents should you hand the valuer?
The right paperwork speeds up the report and reduces the chance of conservative assumptions creeping into the final figure. Gather these before the inspection, not during it.
- Title or Computer Register showing current ownership
- LIM or building report, if you have one on hand
- Building consent numbers and code compliance certificates for any renovations
- Architectural or as-built plans
- Receipts for major renovations or structural work
If you own a unit title property, add body corporate minutes, the latest annual accounts and any pre-contract disclosure statement. Valuers need to assess ongoing levies and liabilities, and body corporate paperwork is where that evidence lives.
Email a neat digital pack to the valuer or their office a day or two ahead. A single PDF folder beats a pile of loose papers handed over on the doorstep, and it shows the valuer you’ve done the legwork.
Should you renovate before a valuation?
Match your spend to your street, not your ambitions. A kitchen or bathroom refresh, fresh landscaping and catching up on deferred maintenance tend to lift a valuer’s confidence more than a single luxury feature that doesn’t fit the neighbourhood.
Overcapitalisation happens when your renovation spend outpaces what the local market will support. Dropping $80,000 into a designer kitchen in a suburb where comparable homes sell for $650,000 rarely returns that spend in the valuation. As a rough rule of thumb, keep discretionary pre-sale spend to a modest slice of the property’s estimated value, and lean towards cosmetic fixes over structural ones unless a defect genuinely needs addressing.
- Repaint scuffed walls and refresh tired carpet
- Tidy the garden beds and mow before anything else
- Skip the granite benchtop unless the rest of the street has one too
Pro Tip: If you’re weighing a renovation against a quick sale, a construction and renovation guide on ROI-focused upgrades is worth a read before you commit a large budget.
How do you gather comparable sales evidence?
Find three to five recent sales of similar homes nearby, matched as closely as possible on size, condition and land. Note the address, sale date and any headline differences (renovated versus original, corner site versus standard section). Guides on assembling comps recommend keeping sales brochures or an agent’s contact details handy, since very recent local sales sometimes haven’t landed in a valuer’s database yet.
- List address, sale date, price and key differences for each comp
- Keep the sales brochure or listing screenshot as backup
- Note the agent’s name in case the valuer wants to verify details directly
Understand that a valuer weighs your evidence alongside their own market data and professional judgement. Handing over comps helps, but the final call sits with them, not with you.
What happens after the valuation inspection?
Don’t expect a number on the spot. Valuers research after the visit, cross-checking your comps against sales databases and market movements before finalising assumptions, photos and the report itself. Turnaround typically runs from a few days to a couple of weeks depending on the valuer’s workload.
If the figure lands lower than expected, check the stated assumptions first. Supply further evidence if something was missed, request a written clarification, or ask for a formal review. A second valuation is worth considering only if you have genuinely new evidence to offer.
A seller’s perspective: two quick wins and one hard call
Small fixes carry real weight. One seller cleared a cluttered garage and fixed a dripping tap the morning of the inspection and saw the valuation land closer to expectations than the online estimate suggested. Another supplied a full consent history for a deck rebuild, and the valuer didn’t need to query it at all.

Not every story ends with a higher number. One homeowner received a valuation well below what they needed and, rather than gamble on a second opinion, chose a fast cash sale through easySale instead. Whatever path you take, be upfront about defects and keep every receipt. Honesty and paperwork protect you either way.
How do you communicate effectively with the valuer?
A valuer’s visit usually runs 20 to 40 minutes, so use that window wisely. Walk them through anything that isn’t obvious at a glance, particularly work that adds genuine value but might otherwise go unnoticed.
Point out consented renovations directly rather than assuming the valuer will spot them. A new bathroom, a rewire or an insulation upgrade means little in a report if the valuer doesn’t know it happened, or worse, assumes it’s unconsented. Hand over your document pack early in the visit so they can cross-reference as they walk through, not as an afterthought on the way out.
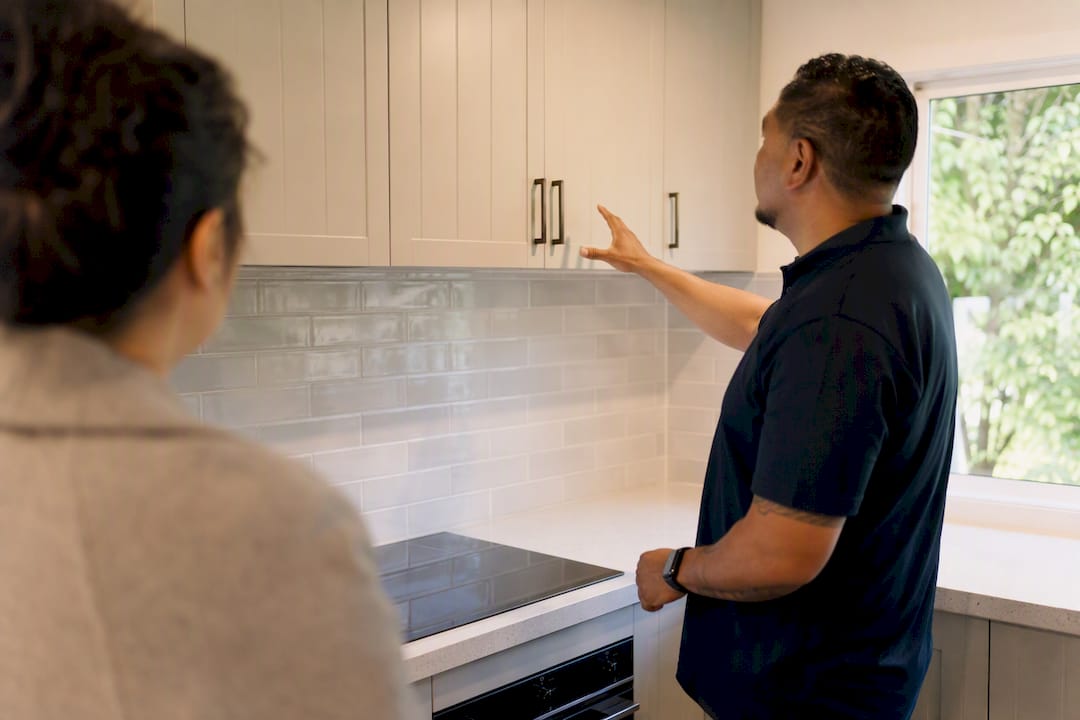
Answer questions directly and briefly. Valuers appreciate straight answers about the age of the roof, the last time the hot water cylinder was replaced, or whether a boundary fence sits on the actual title line. Overselling a feature or dodging a question about a known issue tends to backfire. It reads as evasive and can prompt closer scrutiny elsewhere in the report.
Stay nearby but don’t hover in every room. Let the valuer work through their own process, then step in for questions or to point out something specific, such as a recently reclad exterior or a new heat pump. If there’s a feature that doesn’t photograph well, like a view from an upstairs window, mention it. A valuer moving quickly through a property will miss details you’d never think to flag.
Keep the conversation factual rather than persuasive. A valuer is trained to spot a sales pitch and will weigh their own inspection over your opinion regardless. Evidence and clarity build more credibility than enthusiasm.
Which valuation method will apply to your property?
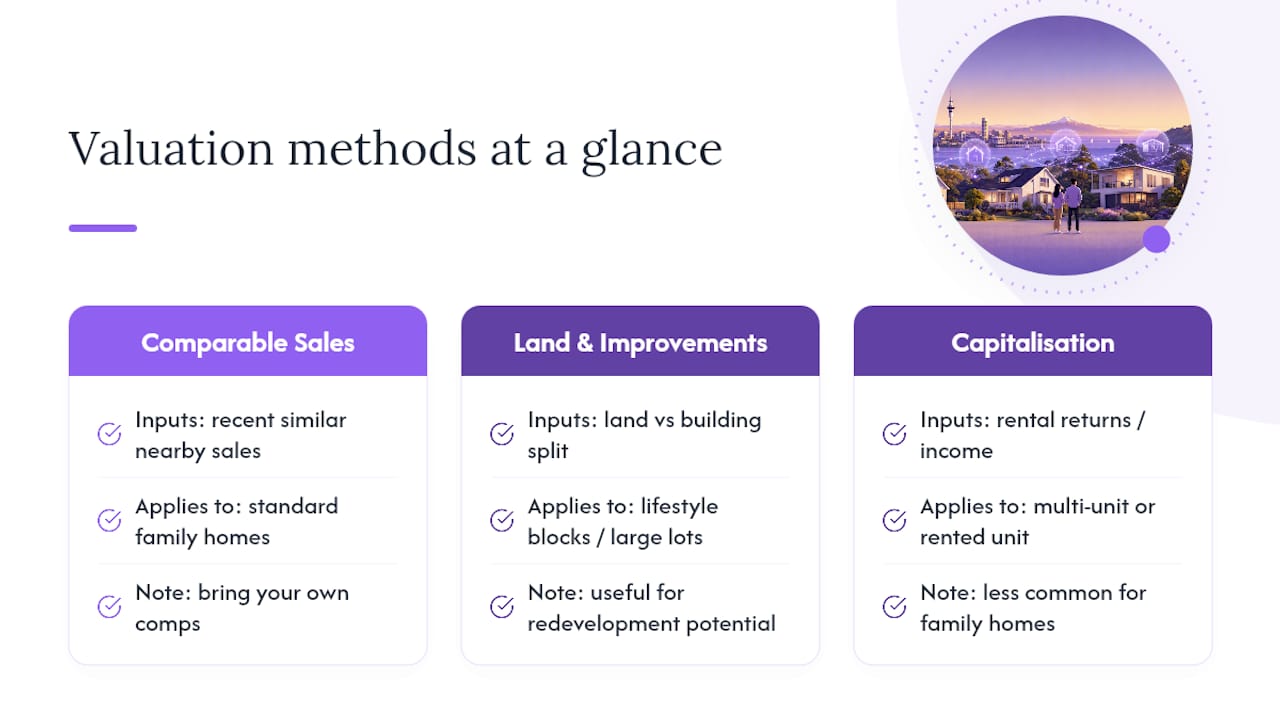
Most residential valuations in New Zealand rely on the comparable sales method, where the valuer benchmarks your home against recent, similar sales nearby. This is why gathering your own comps matters so much. It’s the same evidence base the valuer is working from, and presenting it clearly can only help.
For unusual properties, lifestyle blocks, or homes with significant land value relative to the building, valuers sometimes lean on the land and improvements method. This separates the value of the section from the value of what’s built on it, useful when a property sits on a larger-than-typical block or has redevelopment potential.
Income-producing or multi-unit properties may involve a capitalisation approach, based on rental returns rather than sale comparisons. This is less common for standard family homes but relevant if you’ve got a self-contained unit or a rented sleepout on the section.
Each method draws on different inputs, so knowing which one likely applies helps you prepare the right evidence. A standard three-bedroom home in an established suburb will almost certainly be valued through the comparable sales method. A lifestyle block with substantial land relative to a modest dwelling might see more weight placed on land value.
None of these methods override the valuer’s on-site inspection. The method sets the framework, but condition, consents and presentation still shape where within that framework your property lands. This is exactly why the practical prep work covered earlier carries real weight regardless of which method the valuer applies.
How can you address negative factors before the valuation?
Unconsented work, deferred maintenance and weathertightness issues are consistently the factors that drag a valuation down hardest. Address what you can and disclose the rest honestly rather than hoping it goes unnoticed.
If you’ve got unconsented renovations, check with your local council about a certificate of acceptance before the inspection if time allows. Where that’s not realistic in 48 to 72 hours, disclose the work plainly rather than let the valuer discover it and assume the worst about scope and quality.
Deferred maintenance, like a tired roof, cracked guttering or a rotting deck board, should be fixed if the cost is modest. For bigger structural concerns, get a written quote from a tradesperson ahead of the inspection. Showing the valuer you understand the issue and have a fixed cost in hand reads far better than an unexplained defect sitting untouched.
Weathertightness problems deserve particular care given New Zealand’s building history. If there’s any sign of moisture ingress, mould or previous leaky home remediation, have the paperwork ready. A guide to why properties sell below market value covers these risk factors in more depth if you want to understand how they typically get weighed.
- Get a certificate of acceptance for unconsented work where possible
- Fix cheap deferred maintenance; quote the expensive stuff
- Have weathertightness remediation paperwork ready if it applies
- Disclose rather than disguise anything you can’t fix in time
How do you read and use the valuation report afterwards?
Once the report lands, read the assumptions section first. This is where a valuer states what they took as fact, square metreage, number of bedrooms, consent status, and it’s the fastest place to spot an error that dragged the figure down.
Check the comparable sales the valuer used. If they’ve relied on properties that don’t genuinely match yours in condition or location, that’s worth raising. Compare their comps against the ones you gathered yourself; a mismatch is often the simplest explanation for a lower-than-expected figure.
Look at the photos included in the report. These confirm what the valuer actually saw and can highlight whether a feature you thought was obvious, a renovated ensuite, a new deck, didn’t get captured or credited properly.
If you’re using the report for lending purposes, your bank will apply its own loan-to-value ratio against the valuer’s figure, not your own estimate. Understanding that gap matters if you’re planning a refinance or a purchase contingent on this number. If you’re using it to inform a sale price, treat it as one strong data point alongside current listings and agent feedback, not as the final word on what a buyer will actually pay.
The gap between valuation advice and what actually works
Most guides tell you to “present your home well” without saying what that means in practice. The research behind this article points to something more specific: paperwork and disclosure carry as much weight as a clean kitchen bench. Sellers chase cosmetic perfection and forget that a missing consent number or an unexplained renovation can undo hours of tidying.
The conventional advice also underestimates how little control you have over the final figure. You can’t argue a valuer into a number, and trying to oversell a feature usually backfires. What you can do is remove friction: hand over comps, consents and receipts so the valuer spends less time guessing and more time confirming what’s already true about your property.
If there’s one thing worth prioritising above all else, it’s honesty about defects paired with genuine documentation. A valuer who trusts your paperwork will trust your property. That trust shows up in the final number more often than a fresh coat of paint ever will.
— Aaron
Get a fast, no-obligation cash offer instead of waiting on a valuation
Easysale is the alternative to a drawn-out sale process for homeowners who’d rather skip the agent fees, the repairs list and the waiting altogether. If a valuation comes back lower than hoped, or you simply don’t have weeks to spend on prep, presentation and open homes, a direct cash sale settles on your timeline instead of the market’s.

The process runs in three steps: submit your property details, receive a no-obligation cash offer, then settle on a date that suits you. There are no commission fees, no requirement to fix anything beforehand, and no real estate agent involved at any stage. It suits sellers dealing with financial pressure, an inherited property, tenancy complications or simply a home in need of more work than they want to take on.
If waiting on a valuation and a traditional sale doesn’t fit your circumstances, get a fast offer at Easysale and see where you stand.
This article is general information, not a substitute for advice from a qualified financial advisor. Consult a qualified financial professional about your own circumstances before acting on anything here.
Sources
- Monetary Policy Statement, August 2025 — Reserve Bank of New Zealand
- What goes into a residential valuation report? | CBRE New Zealand
- Property values NZ: the ultimate guide to finding your home’s worth — DEN
- What do property valuers look for? | Trade Me Property
Recommended
